Overview
The power of the “Virtual Application” pattern is that we can add any our owned/third-party software in our platform by developing the corresponding “plug-in” for it, without changing our existing platform and in an efficient reusable way. However, developing a plug-in for our platform needs a deep understanding of our platform’s convention, configuration and details. We believe that, a tool can help the plug-in developers to do their work better: it can provide the basic structure of a plug-in project, an user-friendly UI to edit the configuration files, an easy way to debug and etc. This tool is the workload plug-in tool we are working on.
Our goal is to provide an Eclipse plug-in, which can make an Eclipse IDE become a virtual application plug-in development environment. With our plug-in features and the power of the Eclipse IDE and other third-party plug-ins, such as PyDev, developing a workload plug-in will be much more easier.
Installation
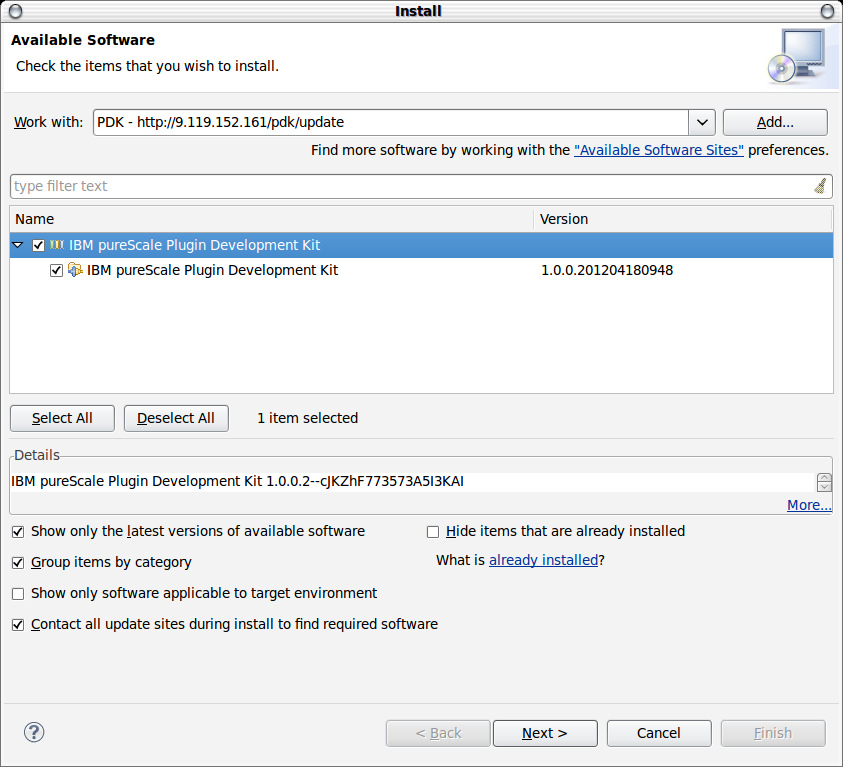
Currently we have a internal-use only Eclipse update server. You can install our Eclipse plug-in with the server like any other Eclipse plug-in. Here is the instructions.
In your Eclipse(pleas make sure the version of your Eclipse is 3.6 or above), go to “Help -> Install New Software…”, click the “Add…” button, use the following URL as the “Location” field value and give it a name as anything you like, then click “OK” button.
Select the plug-in and install it.
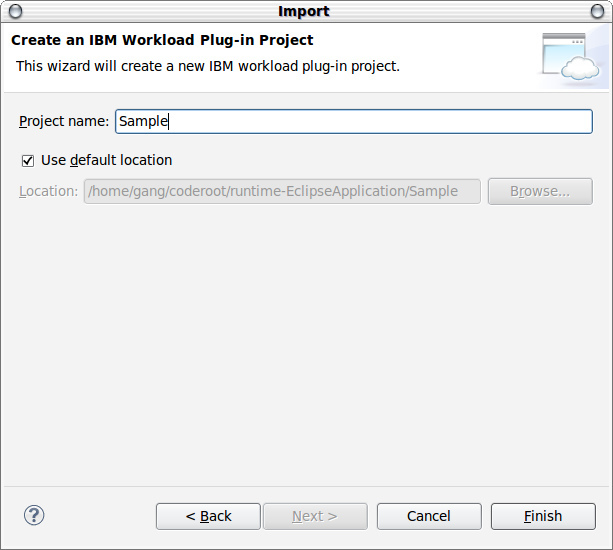
Creating a new project
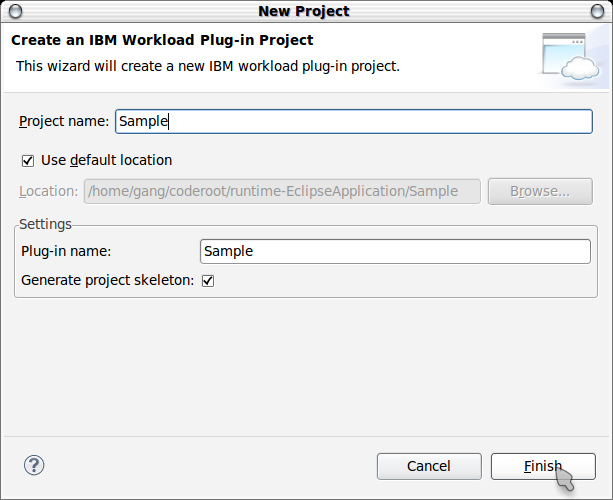
Create a virtual application plug-in project is similar to creating any normal project in Eclipse IDE: go to “File -> New -> Project…”, select “IBM Workload Plug-in Development -> Workload Plug-in Project”, click the “Next” button. Then you will see the wizard page of creating a new workload plug-in project like below:
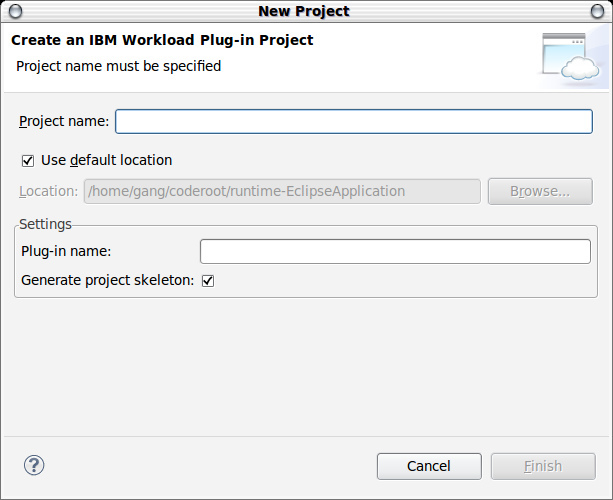
In the wizard page, you are requested to give this project a project name and a plug-in name. The project name is the Eclipse project name, and the plug-in name is this plug-in’s name which you are developing. By default the plug-in name will use the project name automatically, however you can still change it to another name. The “Generate project skeleton” check box means that, if you choose this option(that’s the default behavior), the wizard will create a bunch of files/directories automatically which are usually needed by the most plug-in projects; if it’s unchecked, the files/directories will not be created by default, you have to add them later manually.
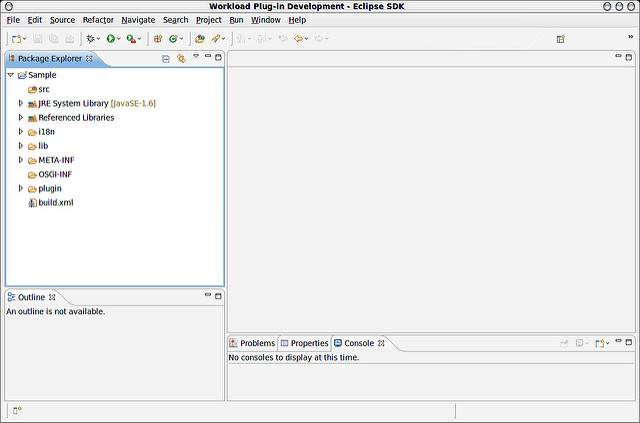
After the wizard finishes, you can see the generated project’s artifacts like this:

Here’s a brief introduction of the files/directories:
- src: You can create your Java code in this directory;
- i18n: where the internationalization files are;
- lib: all the jar files needed for compiling this plug-in project;
- META-INF: meta data file(s);
- OSGI-INF: OSGi configuration file(s);
- plugin: the plug-in configuration directory, in which the “config.json”, the “appmodel”, “nodeagents”, “parts” and “templates” directories should be there;
- build.xml: the ant build file which is needed to build this project.
Then you can start the plug-in development by adding content to these artifacts.
Importing a project
If you have an existing plug-in project already, and you want to import it into this plug-in development environment, the “importing” feature is what you need. First, you should have a “tar.gz/tgz” format plug-in package, there’s the standard format for a existing plug-in, then open the IDE and go to “File -> Import…”, select “IBM Workload Plug-in Development -> IBM Workload Plug-in Package”, click the “Next” button. Then you will see the wizard page of importing a workload plug-in package like below:
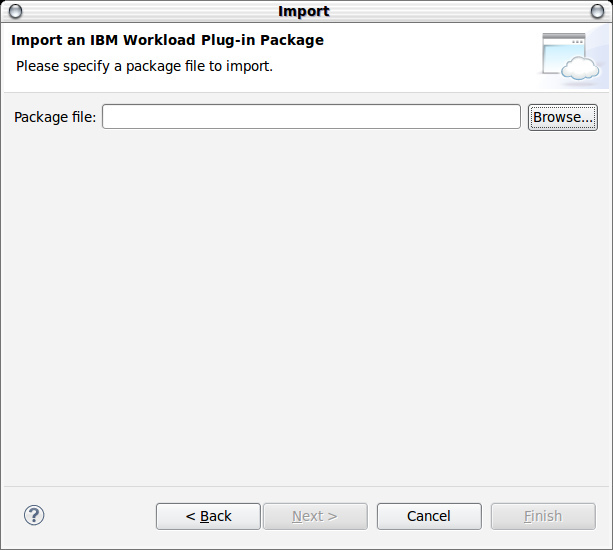
In this page, you are requested to select a plug-in package file. Click the “Browse…” button, an OS file selection dialog will be opened, select your plug-in package file and then click the “Next” button, which will navigate you to the next page of this wizard.
In the second page, you can set your project name and project location. By default, the plug-in name of your plug-in package will be used as the default project name, you don’t need to change it normally. The default project location is inside the default workspace location of your Eclipse, you can change it as you will.
Then you can click the “finish” button, the wizard will extract your package and composite the plug-in project according to the content of your package. It looks like below:
Then you can start the plug-in development by editing the content of these artifacts.
Plug-in configuration (config.json)
After a project is created/imported, you can start working on that, such as editing the plug-in configuration(config.json). First open the “Project Explorer” view, expand “project -> plugin -> config.json” node, double click to open it. Here is the screen copy.
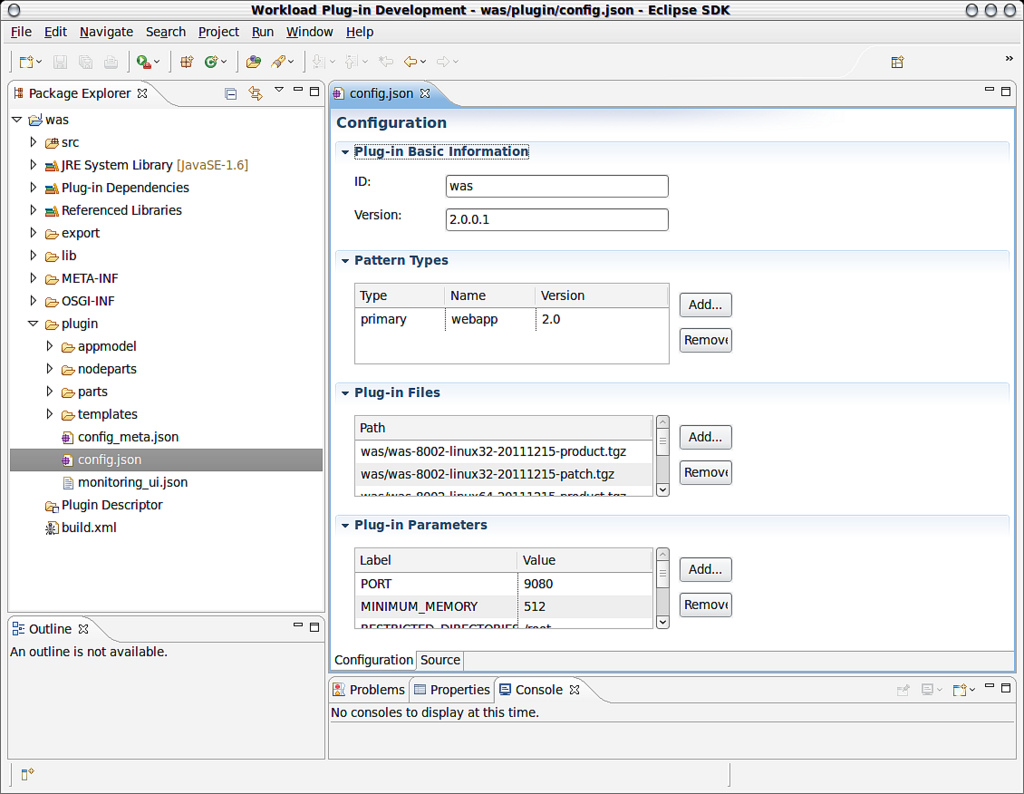
In this Configuration UI form page, you can edit the configuration in a GUI way. It’s very straightforward. However, in some cases editing the text directly is a much faster way, so we provide the text editing mode to edit the configuration as well, click the “Source” tab to enter the text editor mode.

Component property UI configuration (metadata.json)
In this toolkit we have a editor for the property UI configuration “metadata.json” file. When you open the “metadata.json” file in the Eclipse IDE, the editor will be displayed automatically:
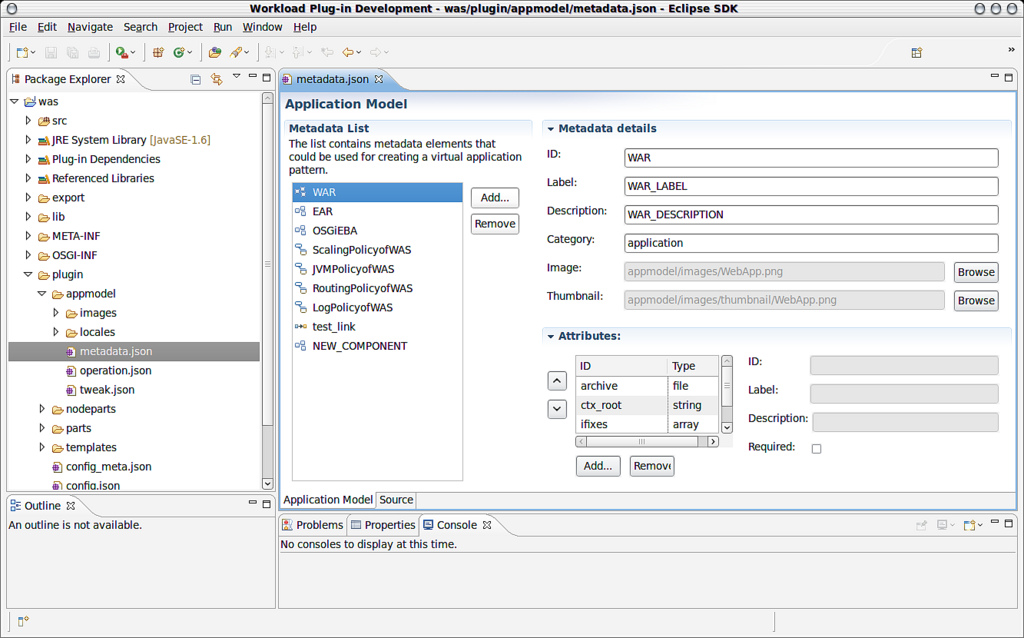
In the above UI form editor, you can edit the content by operating the UI components. And you can also edit the text content directly in the “Source” tab:
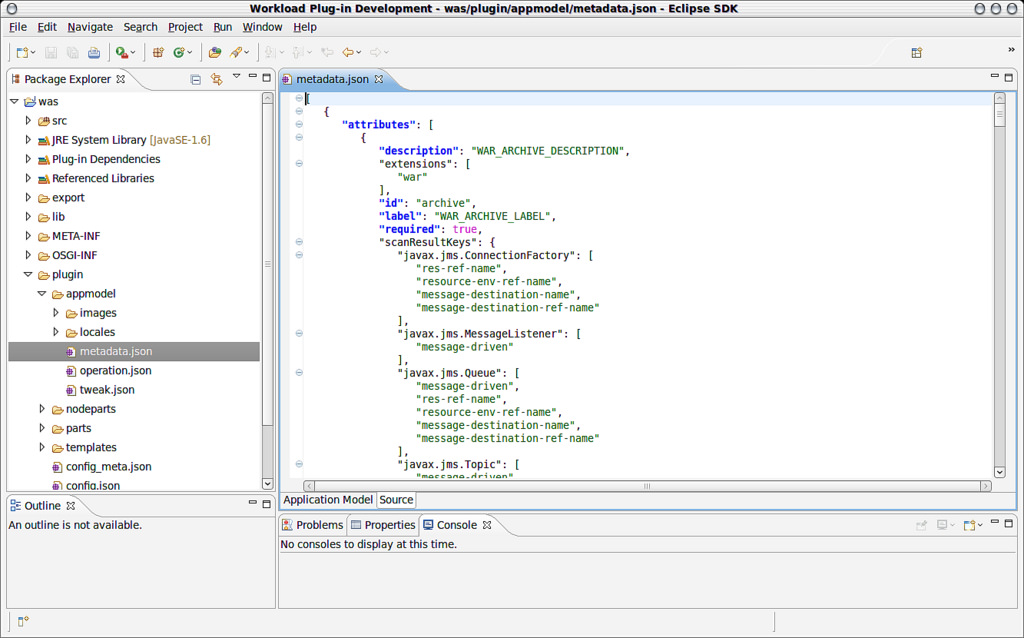
Both of the 2 tabs do the same thing: edit the content of “metadata.json” and they are synchronized automatically to each other.
Instance Management Configuration
We also have the editors for the following instance management configuration:
openration.json
Here are the screen copies of the “operation.json” editor, you can open it by expanding “project -> plugin -> appmodel -> operation.json” and double clicking.
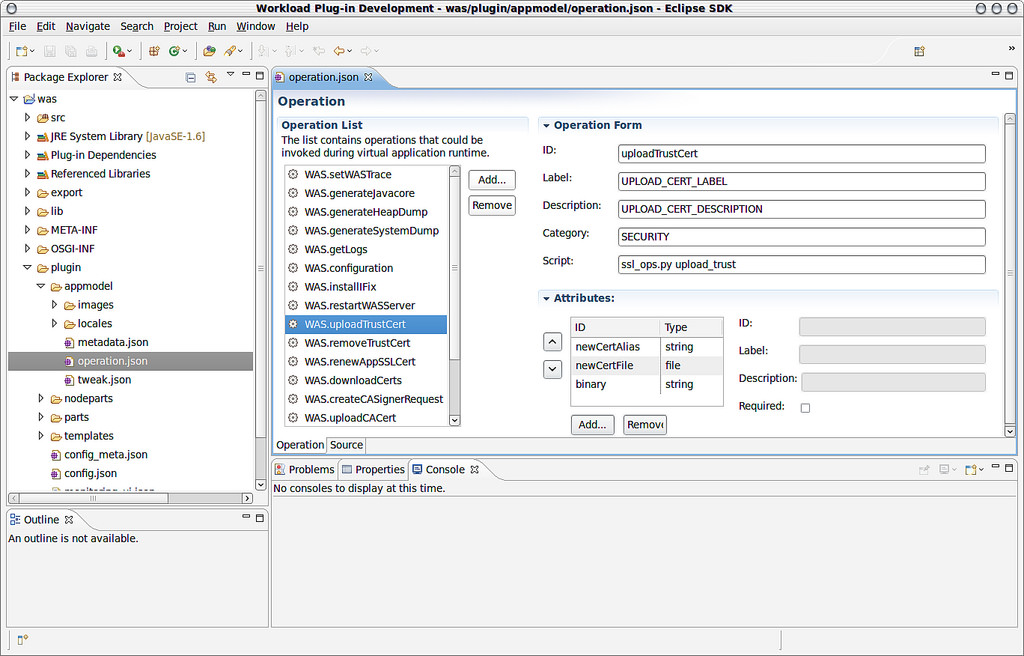

In the “Operation” tab you can edit the content in an UI form way, while in the “Source” tab you can edit the text content directly.
tweak.json
Here are the screen copies of the “tweak.json” editor, you can open it by expanding “project
-> plugin -> appmodel -> tweak.json” and double clicking.
![tweak.json UI form editor][tweak_json_ui_url]

![tweak.json text editor][tweak_json_text_url]

In the "Operation" tab you can edit the content in an UI form way, while in the "Source" tab you can edit the text content directly.
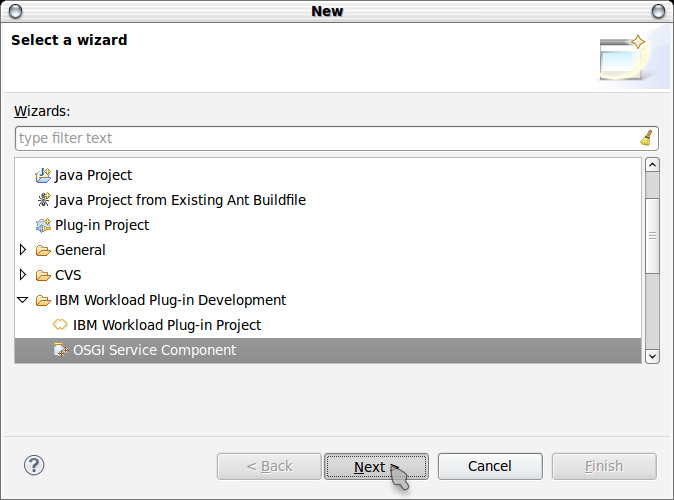
Creating OSGi components(wizard)
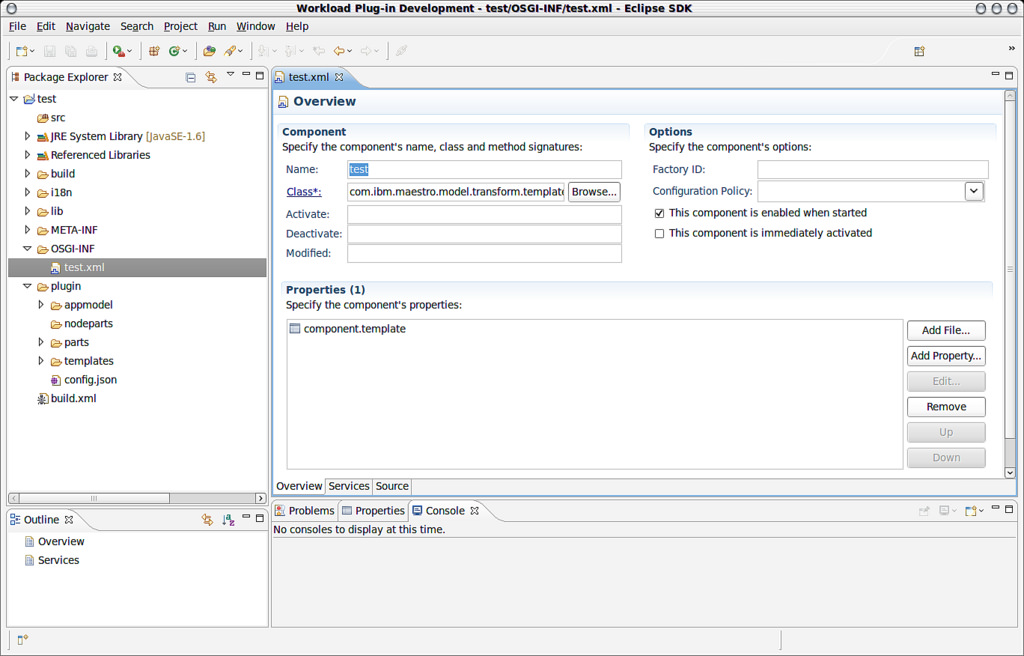
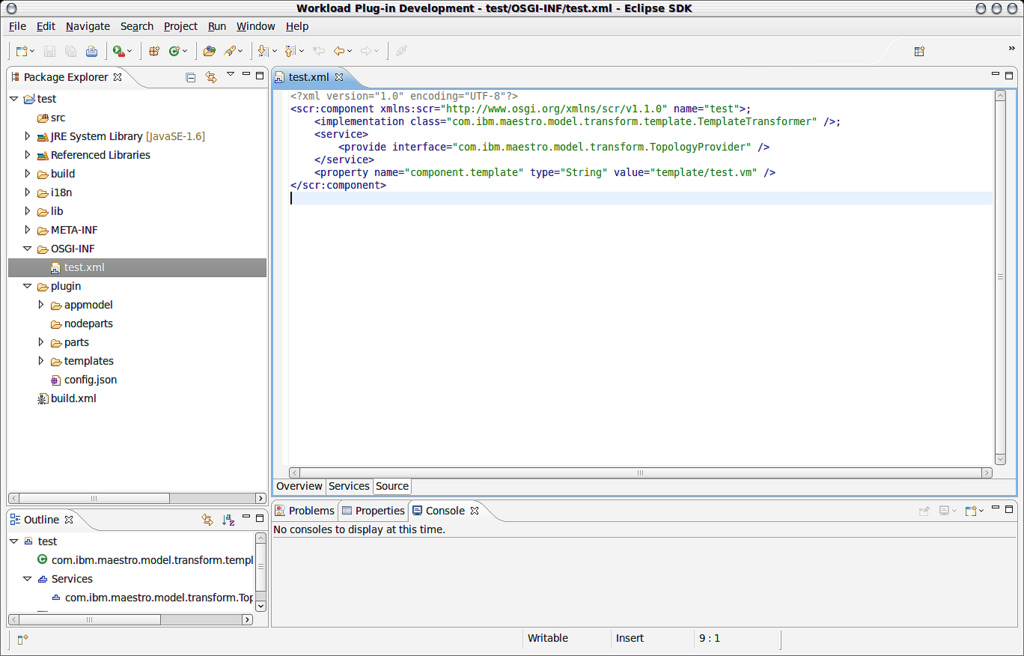
You can use the “OSGi component wizard” to create a new OSGi component. First, right click the “OSGI-INF” directory node in the “Project Explorer” tree view. In the pop-up menu, select “New -> Others -> IBM Workload Plug-in Development -> OSGi Service Component”, then click the “Next” button, you will see the followin wizard page:
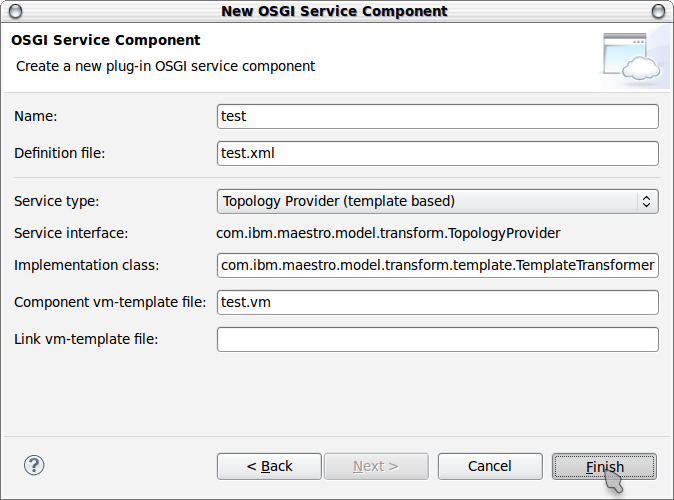
After the wizard finishes, you can edit the corresponding xml file in the followin editor, which provides both UI-form and text manners to edit:
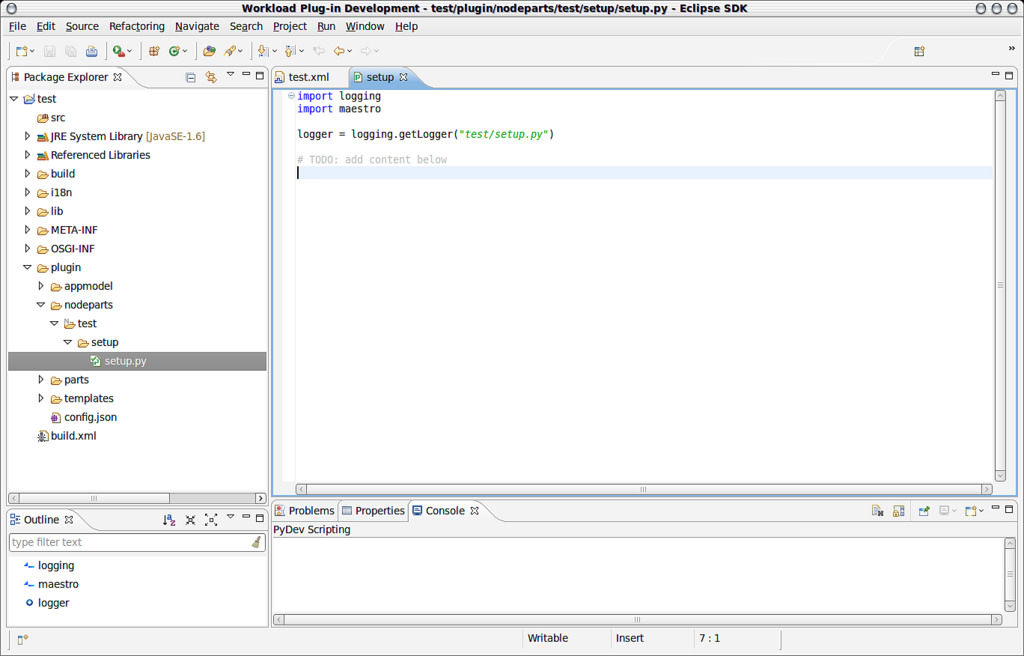
Creating Node Parts(wizard)
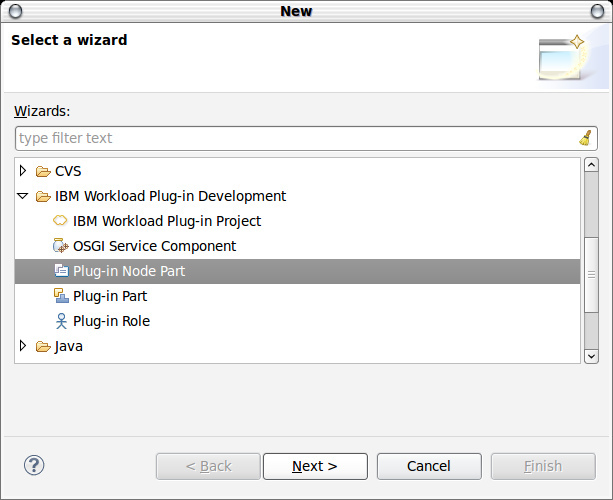
You can use the “node part wizard” to create a new node part. First, right click the “plugin -> nodeparts” directory node in the “Project Explorer” tree view. In the pop-up menu, select “New -> Others -> IBM Workload Plug-in Development -> Plug-in Node Part”, then click the “Next” button, you will see the following wizard page:
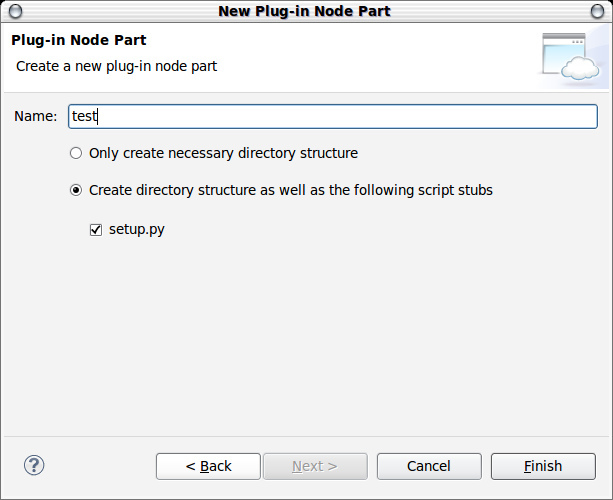
After the wizard finishes, you can edit the corresponding python script file in the following editor(In this example, the PyDev Eclipse plug-in was installed. Please also install it if you need the python Eclipse IDE support as well):
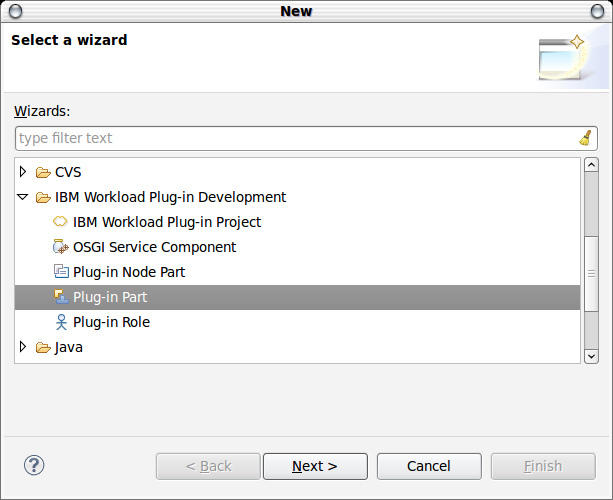
Creating parts(wizard)
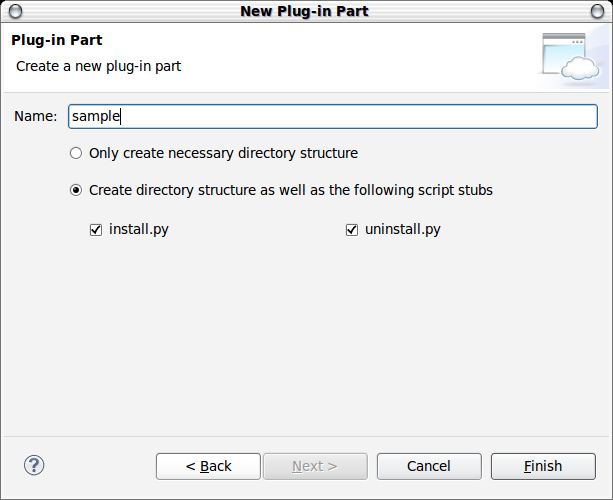
You can use the “plug-in part wizard” to create a new plug-in part. First, right click the “plugin -> parts” directory node in the “Project Explorer” tree view. In the pop-up menu, select “New -> Others -> IBM Workload Plug-in Development -> Plug-in Part”, then click the “Next” button, you will see the following wizard page:
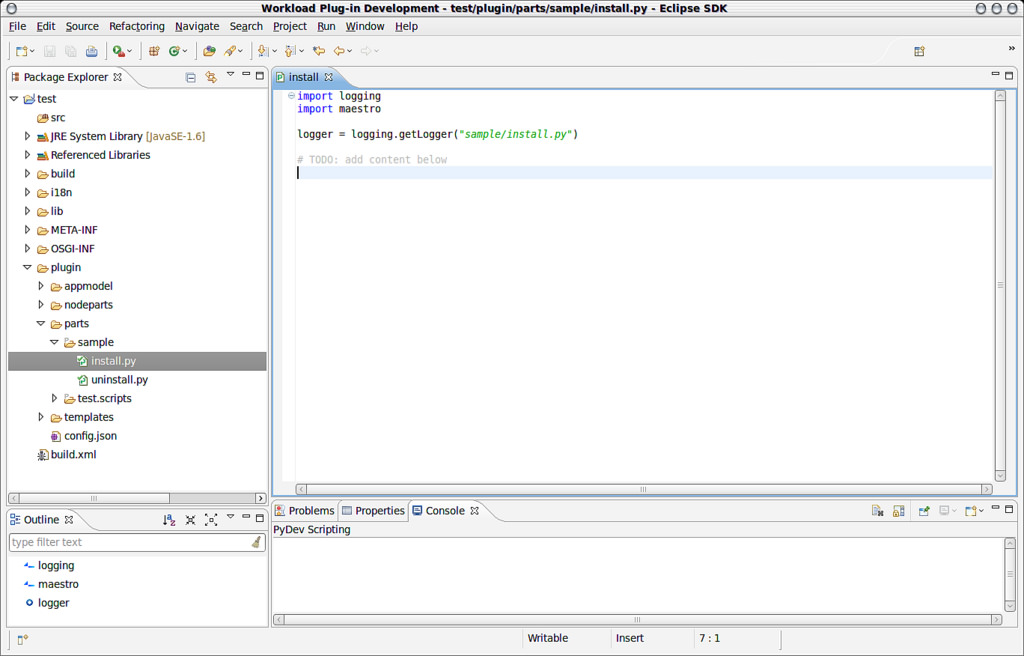
After the wizard finishes, you can edit the corresponding python script file in the following editor(In this example, the PyDev Eclipse plug-in was installed. Please also install it if you need the python Eclipse IDE support as well):
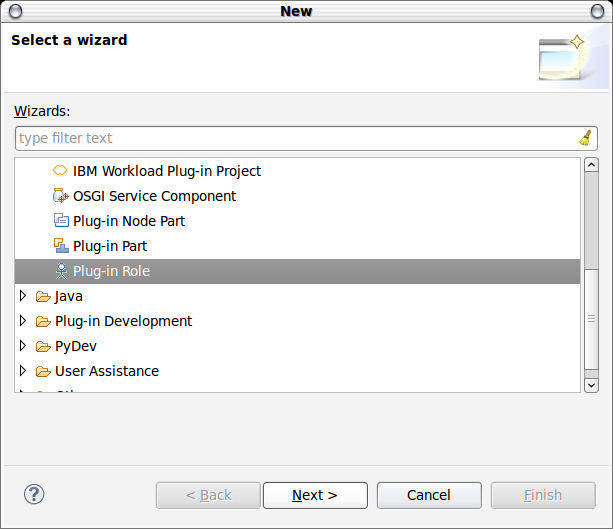
Creating Roles(wizard)
You can use the “plug-in role wizard” to create a new plug-in role. First, right click the “plugin -> nodeparts” directory node in the “Project Explorer” tree view. In the pop-up menu, select “New -> Others -> IBM Workload Plug-in Development -> Plug-in Role”, then click the “Next” button, you will see the following wizard page:
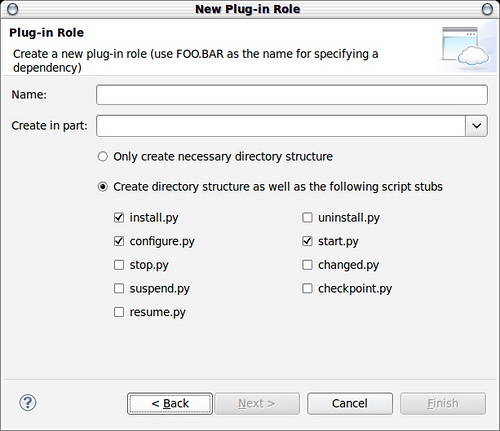
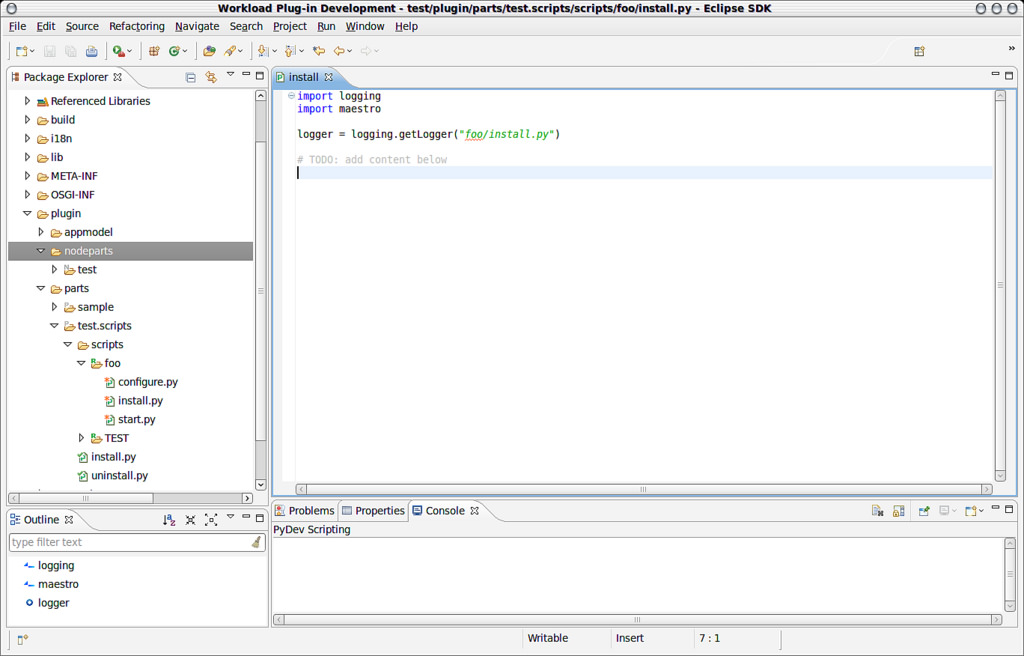
After the wizard finishes, you can edit the corresponding python script file in the following editor(In this example, the PyDev Eclipse plug-in was installed. Please also install it if you need the python Eclipse IDE support as well):
Building plug-ins
You can start the build action by right clicking on the project node, select “IBM Workload Plug-in -> Build/Build with source” in the menu, then a build process is trigged.
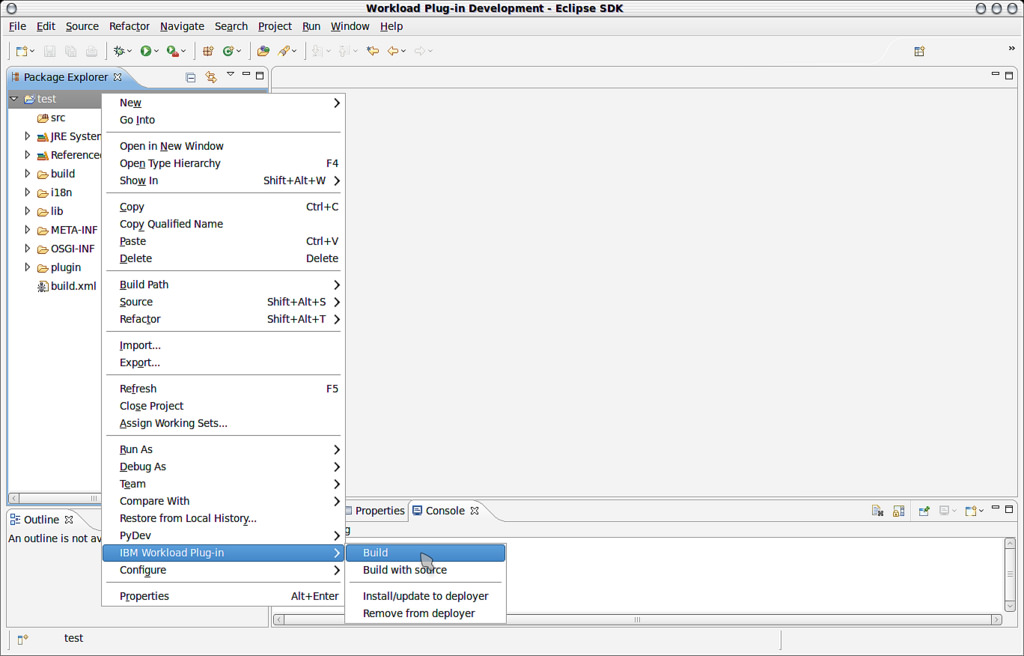
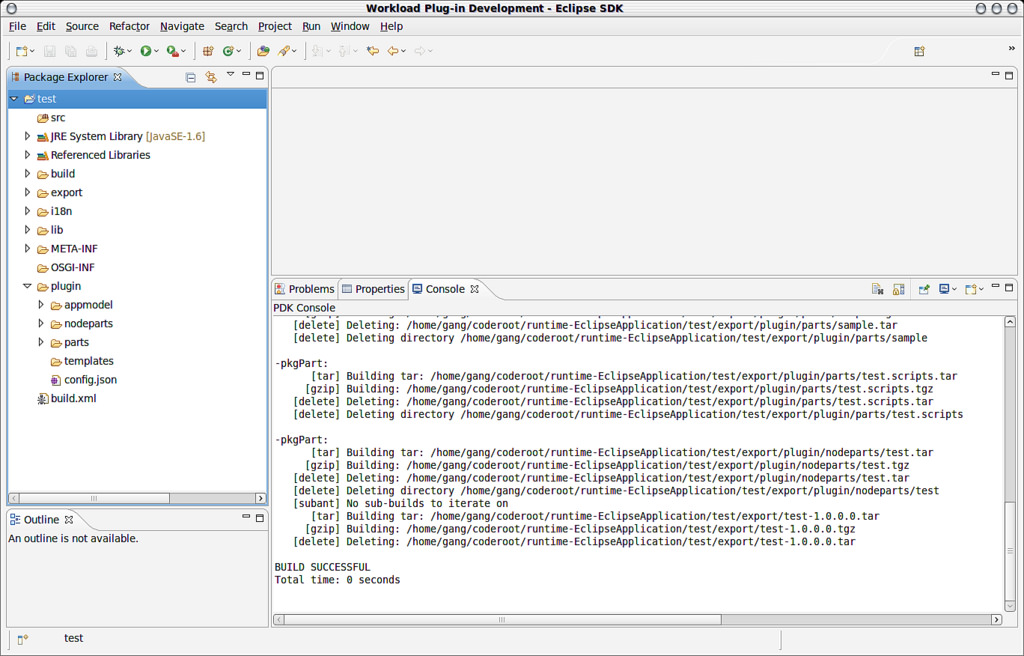
The difference between “build” and “build with source” is that, the latter build result package includes the Java source code while the former doesn’t.
Installing plug-ins
Our development tool also support uploading the current plug-in to a remote IWD environment for testing/debugging.
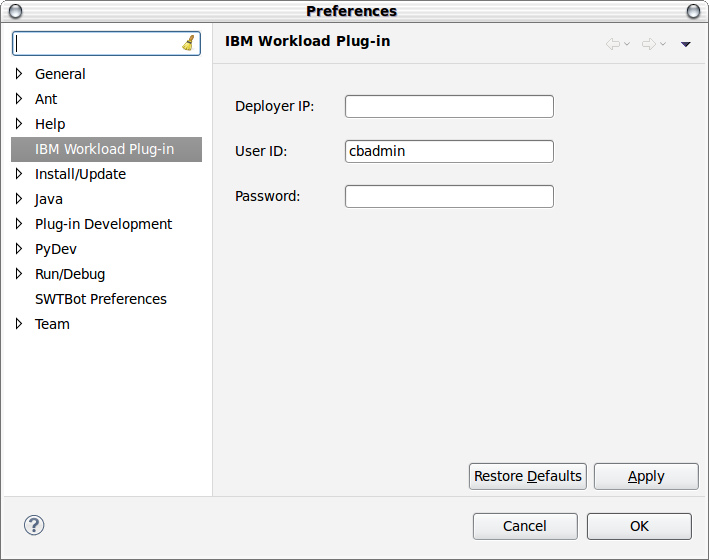
First, add the IWD information in the “Window -> Preferences -> IBM Workload Plug-in”: IP, User ID, Password:
Second, make should you already build the project successfully.
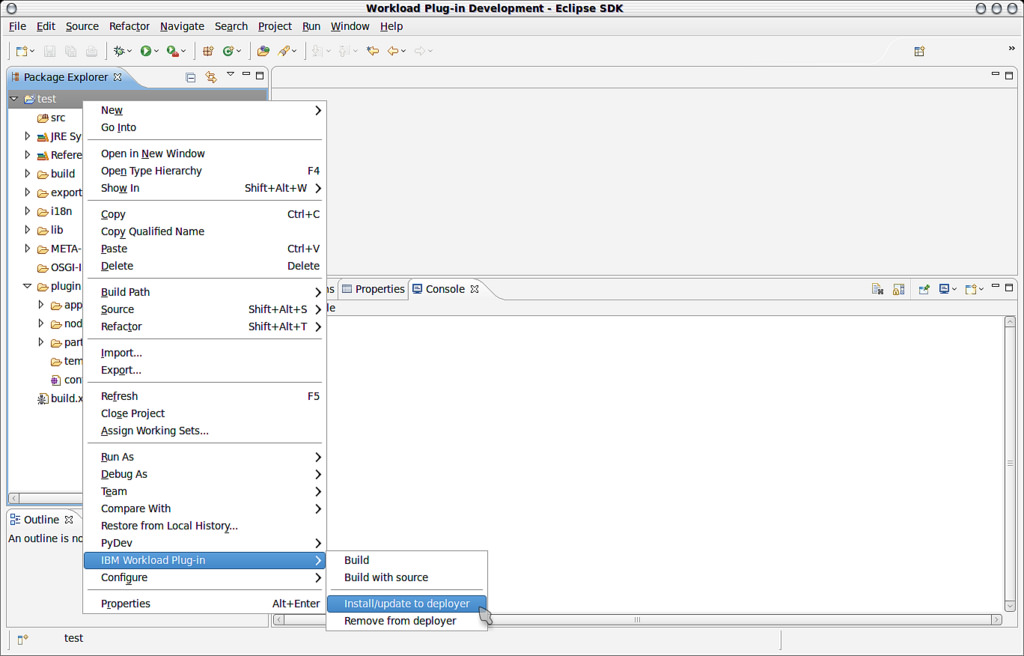
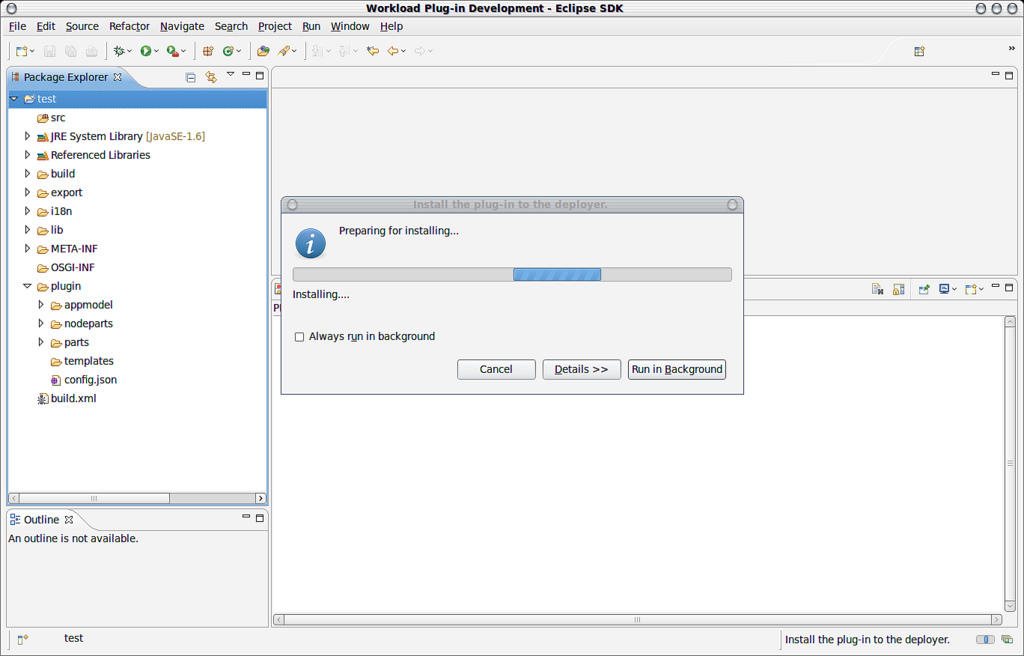
Then right click the project, select “IBM Workload Plug-in -> Install/Update to deployer” in the menu, then an installation process is trigged.
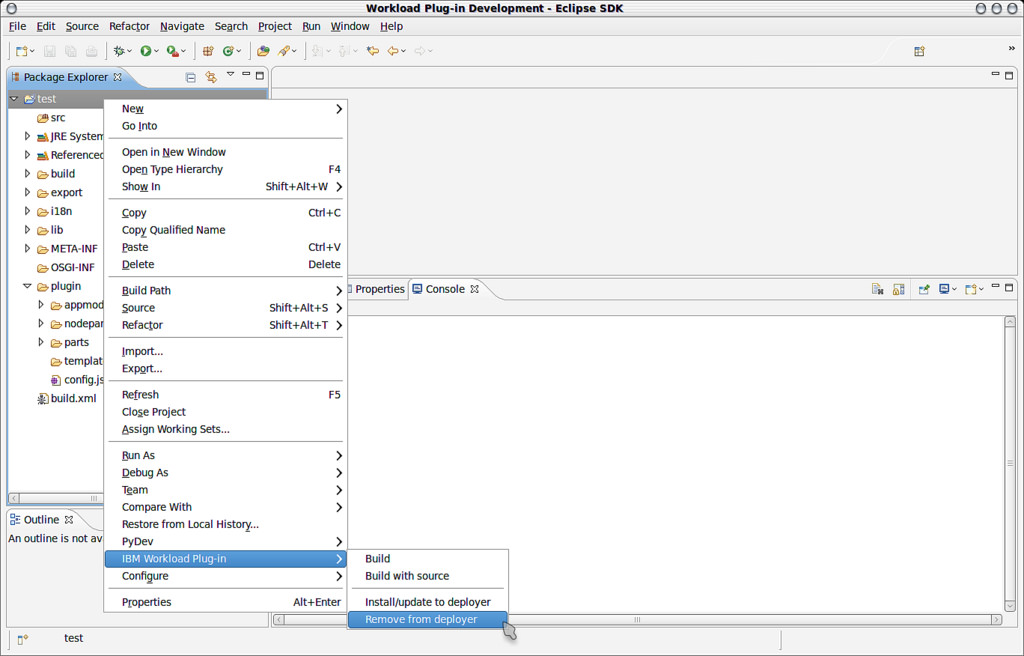
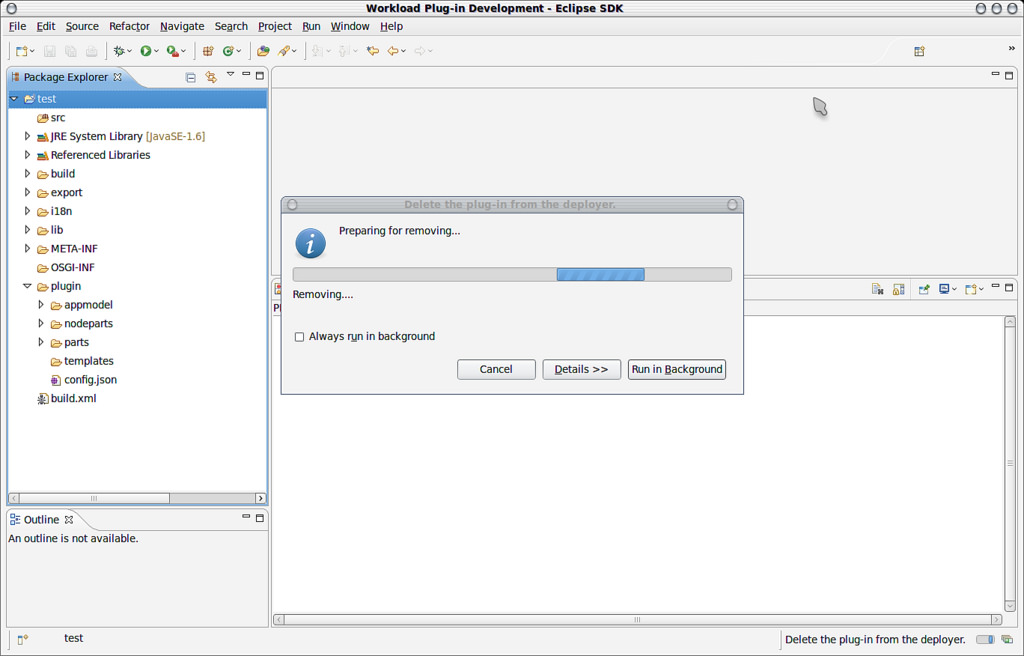
Uninstalling plug-ins
If you want to uninstall the installed plug-in, just right click the project, select “IBM Workload Plug-in -> Remove from deployer” in the menu, then an uninstalling process is trigged.
Limitations
Currently we provide some wizards/editors implementation and try to make the plug-in development more easier. However, there is still many tasks can’t be covered, which can be done by editing the corresponding files directly.